🎯 Introduction
Rust is a modern systems programming language that combines performance, memory safety, and productivity. In this article, we’ll see how to install and configure a complete Rust development environment on Windows WITHOUT administrator rights using Scoop as a package manager.
🎉 Great news: This approach allows you to install Rust and all its dependencies without ever needing admin rights! Perfect for restrictive corporate environments or personal machines.
Why this method? Because traditional Rust installation often requires admin rights for MSVC dependencies. We’ll elegantly bypass this with the GNU toolchain.
📋 Prerequisites
Before starting, make sure you have:
- Windows 10/11 (recent versions recommended)
- Scoop installed (if not done yet, check our Scoop article)
- A terminal (PowerShell, Windows Terminal, or Git Bash)
- ❌ NO administrator rights required! Everything installs in your user directory
🔑 Why this method works without admin rights?
Scoop’s magic:
- User installation: Scoop installs everything in
~/scoop/(your personal directory) - No system modifications: No changes in
C:\Program Files\or Windows registry - Local PATH: Executables are added to your user PATH only
Advantages for restrictive environments:
- ✅ Perfect for companies with strict security policies
- ✅ Ideal for shared computers or virtual machines
- ✅ Reversible installation:
scoop uninstallremoves everything cleanly - ✅ No conflict with other system installations
Comparison with traditional installation:
| Method | Admin rights | System install | Reversible |
|---|---|---|---|
| Scoop + GNU | ❌ Not required | ❌ No | ✅ Yes |
| Standard install | ✅ Required | ✅ Yes | ❌ No |
Let’s start the installation!
🚀 Installing Rust via Scoop
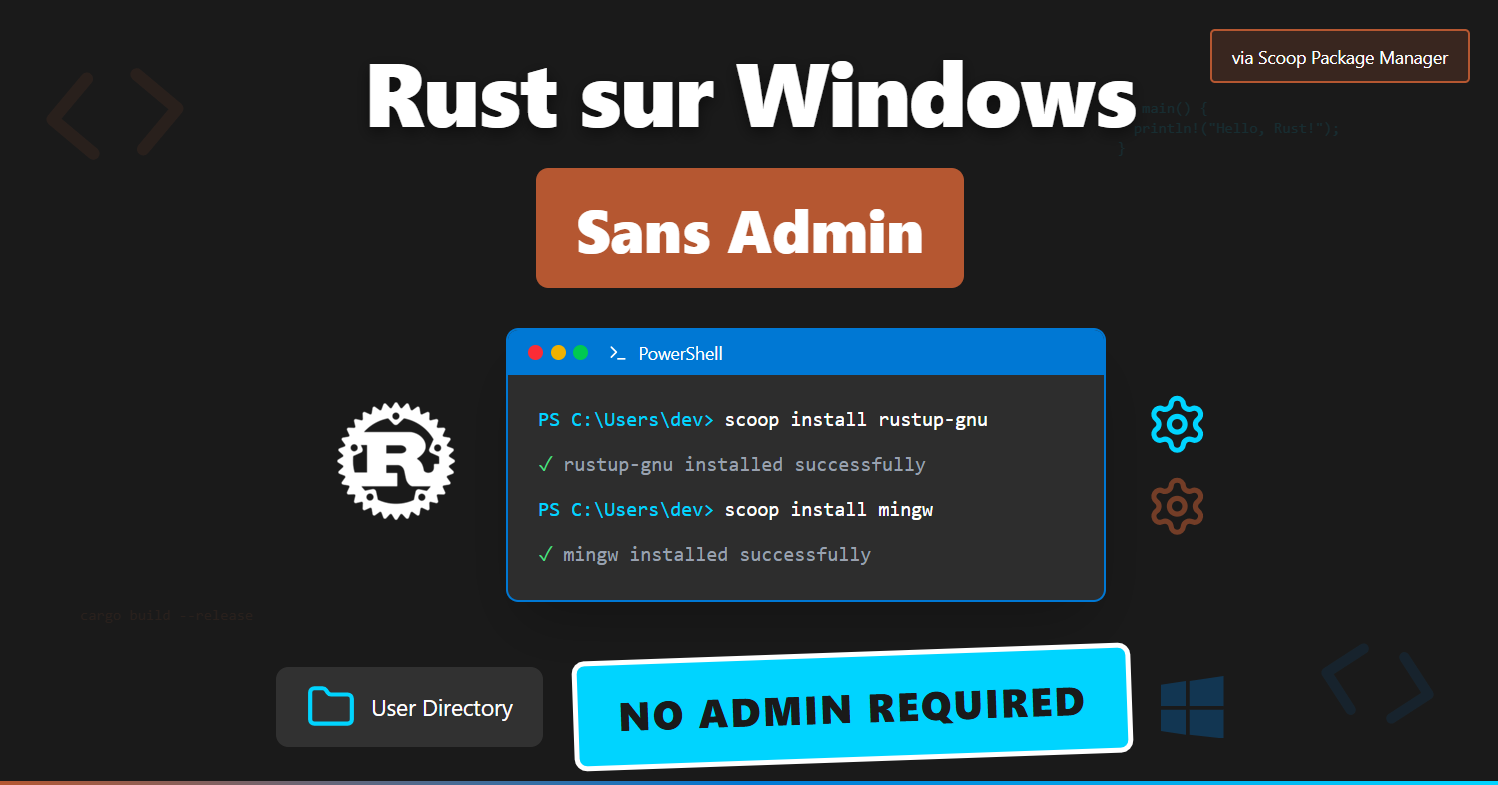
Step 1: Installing rustup-gnu
| |
What does this command do?
- Installs
rustupconfigured to use the GNU toolchain by default - Automatically configures the system PATH
- Avoids having to change the toolchain like with regular
rustup - Includes the GCC toolchain ready to use
⚠️ Important: Restart your terminal/VS Code after installation so PATH changes are taken into account.
Step 2: Installing MinGW-w64
The GNU toolchain requires MinGW-w64 for compilation:
| |
What does this command do?
- Installs MinGW-w64 (GNU for Windows)
- Provides necessary compilation tools (
gcc,g++,dlltool, etc.) - Automatically configures the PATH
⚠️ Important: Terminal restart required after MinGW installation.
Step 3: Verifying the installation
| |
Expected result:
| |
🔧 Solving Common Issues
Issue 1: Missing MSVC Dependencies
If you get this error:
| |
Solution: This error should no longer appear with rustup-gnu, but if it occurs, explicitly use the GNU toolchain.
Issue 2: Missing dlltool
If you get this error despite MinGW installation:
| |
Possible solutions:
- Restart the terminal (PATH not updated)
- Reinstall MinGW:
| |
- Check the installation:
| |
🏗️ Setting up a Web Project with Axum
For a modern web project, here’s a basic configuration:
Project Initialization
| |
Cargo.toml Configuration
| |
Basic Server Example
| |
💡 Concrete Example
To see these concepts in action, check out the demonstration repository that implements a complete Rust web server with Axum:
🔗 GitHub Repository - Rust Web Server Demo
📁 Recommended Rust Project Structure
Here’s the structure of a modern Rust web project (based on our concrete example):
| |
Key elements:
src/main.rs: Entry point with server logicsrc/templates/: HTML templates for viewsCargo.toml: Dependencies and configuration
🛠️ Essential Commands
| |
🔍 Advanced Troubleshooting
Managing Multiple Toolchains
| |
Persistent PATH Issues
If commands are still not found:
- Check PATH:
| |
- Reinstall rustup:
| |
- Complete Windows restart if necessary
Conflicts with Other Rust Installations
If you already installed Rust through other methods:
| |
🎯 Best Practices
1. Use Version Management
| |
2. Optimal VS Code Configuration
Create a .vscode/settings.json file:
| |
3. Dependency Management
- Use
cargo addto add crates - Regularly audit with
cargo audit - Keep dependencies updated with
cargo update
🚀 Next Steps
Now that your environment is configured, you can:
- Explore the official documentation: doc.rust-lang.org
- Follow The Rust Book: doc.rust-lang.org/book
- Join the community: users.rust-lang.org
- Contribute to open source projects
📚 Recommended Resources
- 📖 The Rust Programming Language - The official book
- 🛠️ Rustup Documentation - Toolchain management
- 📦 Crates.io - Rust package registry
- 💬 Rust Discord - Active community
🎉 Conclusion
Congratulations! You now have a complete and functional Rust environment on Windows. The Scoop approach with GNU toolchain avoids MSVC dependency complications while maintaining excellent performance.
Rust is a demanding but extremely powerful language. Take time to explore its unique concepts like ownership, borrowing, and lifetimes.
Your first project awaits! 🚀
Just starting with Rust? Share your first impressions or difficulties encountered!